블로그

  • Best Shower Filters Under $40 (2026 Guide) – Better Water, Softer Skin, and a Cleaner Daily Shower Routine

    Best Shower Filters Under $40 (2026 Guide) – Better Water, Softer Skin, and a Cleaner Daily Shower Routine

    Most people think about the soap, shampoo, or skincare products they use every day, but they rarely think about the water touching their skin and hair. That is a mistake. Your shower water can affect how your skin feels, how your hair looks, and how comfortable your daily routine becomes.

    In many homes, tap water contains chlorine, minerals, sediment, and other impurities. These are not always dangerous, but they can still create noticeable problems. Your skin may feel dry after showering. Your hair may feel rough, dull, or harder to manage. Your scalp may feel irritated. You may even notice that your shampoo does not lather as well as expected.

    A shower filter is a simple product designed to reduce some of these unwanted elements before the water reaches your body. It installs between your shower pipe and shower head, helping improve the quality of the water you use every day.

    The biggest advantage is consistency. You do not need to change your entire bathroom. You do not need expensive plumbing work. You simply add a filter and continue your normal routine.

    In 2026, shower filters under $40 have become much better than older budget models. Many now include multi-stage filtration, easy installation, replaceable cartridges, and universal compatibility with most standard shower heads.

    This guide will help you choose the right shower filter based on real needs: skin comfort, hair softness, ease of installation, and long-term value.


    2. Top Picks


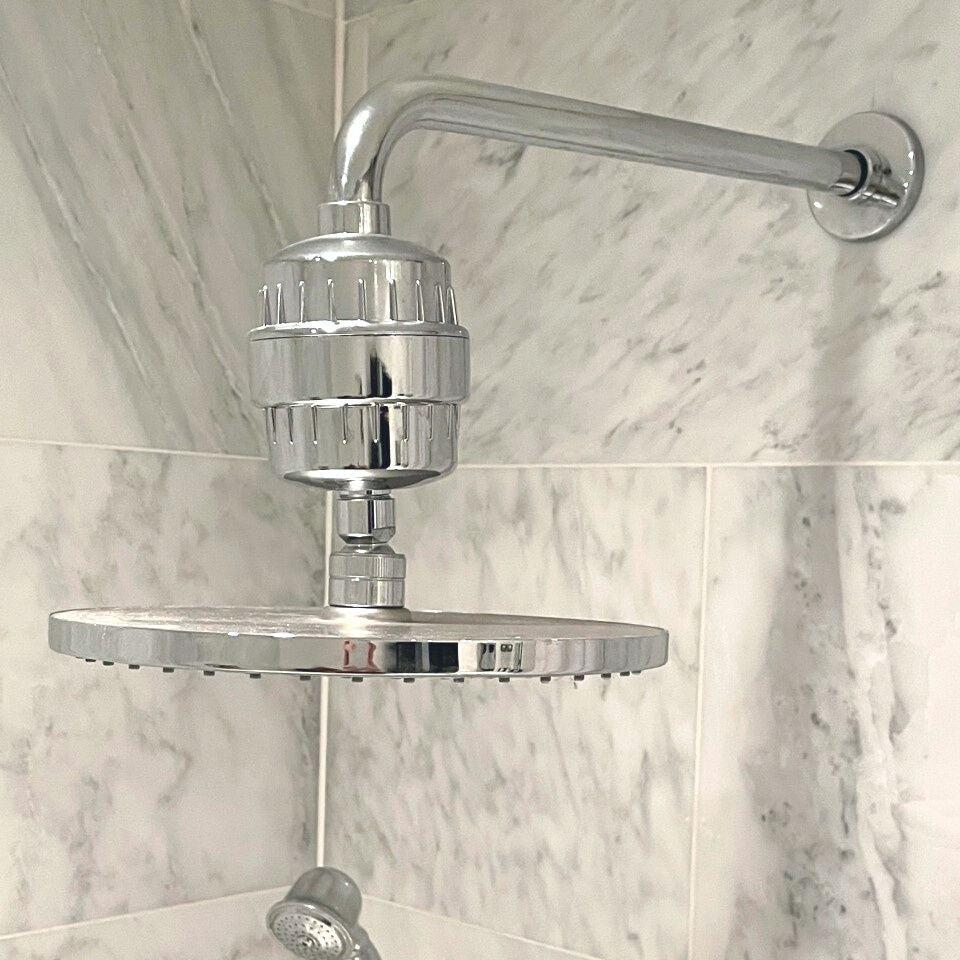
    Best Overall: Multi-Stage Shower Filter

    A multi-stage shower filter is the best overall choice for most people because it balances filtration performance, affordability, and ease of use. These filters usually contain several layers of filtration media, such as activated carbon, KDF, calcium sulfite, or mineral balls.

    The reason this matters is simple: shower water can contain different types of impurities. A single filtration layer may only target one problem, while a multi-stage design can handle a wider range of concerns.

    For example, chlorine is one of the most common reasons people buy shower filters. Chlorine can make water smell harsh and may contribute to dry-feeling skin or hair. A good multi-stage filter helps reduce that strong chlorine smell and makes the shower feel cleaner.

    Another benefit is universal fit. Most multi-stage shower filters are designed to attach to standard shower arms. That means you usually do not need special tools or professional installation.

    This type is especially good for renters because it is easy to install and remove. If you move, you can take it with you.

    The only downside is that replacement cartridges are required. Depending on usage, you may need to replace the filter every few months. Still, the cost is usually reasonable.

    Best for: most households, renters, people with dry skin, and anyone wanting an easy upgrade.


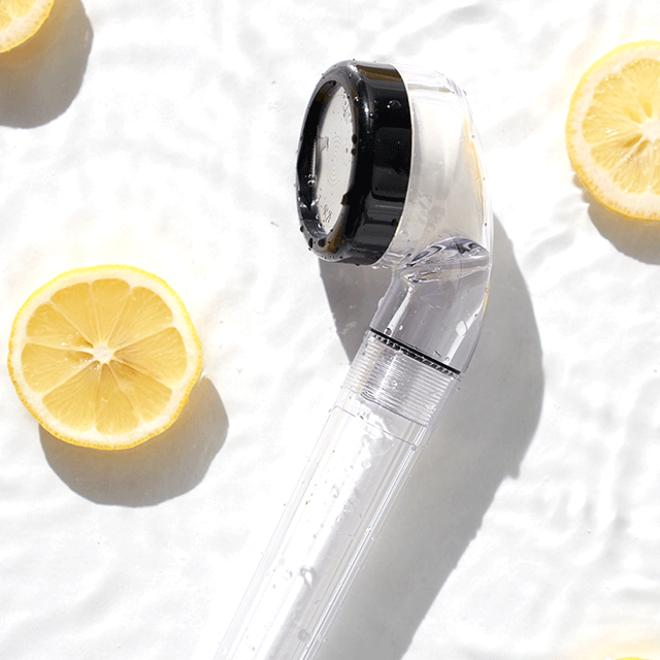
    Best for Hair Care: Vitamin C Shower Filter

    A Vitamin C shower filter is a strong option for people who mainly care about hair softness and chlorine reduction. Vitamin C is commonly used in shower filters because it can help neutralize chlorine in water.

    This type is popular among people who feel their hair becomes dry, frizzy, or rough after showering. If you already use good shampoo and conditioner but still feel like your hair is not improving, your water may be part of the issue.

    Compared to standard multi-stage filters, Vitamin C filters often feel more specialized. They focus heavily on chlorine reduction and shower comfort rather than broad filtration.

    The shower experience can feel noticeably different. Some users report that water feels softer and less harsh. Hair may feel easier to rinse and manage after consistent use.

    However, Vitamin C filters may not last as long as some cartridge-based filters. They can dissolve faster depending on water temperature and usage. This means replacement cost should be considered.

    Best for: people with dry hair, color-treated hair, frizzy hair, or strong chlorine smell in shower water.


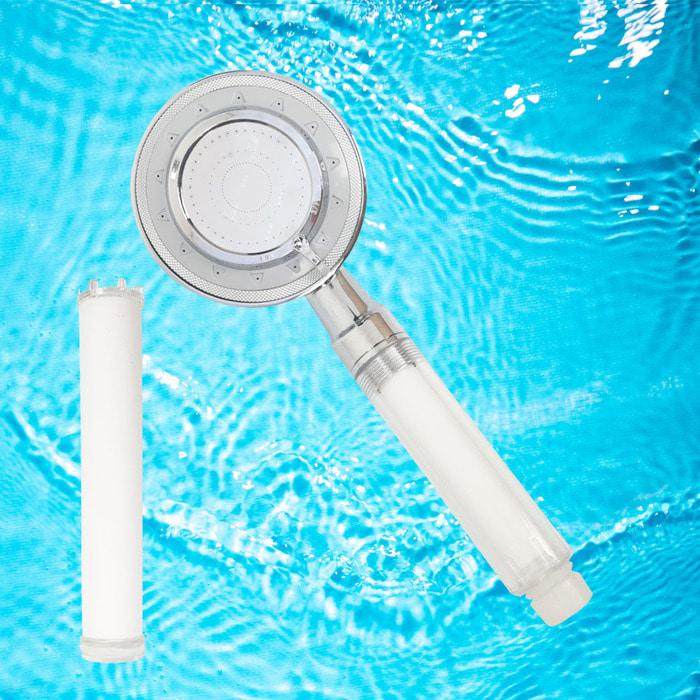
    Best Budget Option: Basic Inline Shower Filter

    A basic inline shower filter is the most affordable option for people who want to test whether filtered shower water makes a difference.

    These filters usually have a simple design and attach directly between the shower arm and shower head. They may not include as many filtration stages as premium models, but they still provide a noticeable improvement over completely unfiltered shower water.

    The biggest advantage is price. If you are not sure whether you need a shower filter, this is a low-risk starting point.

    Another advantage is installation. Basic inline filters are usually very easy to attach. Most people can install them in a few minutes.

    The limitation is performance. A cheaper filter may not reduce as many impurities, and the cartridge may not last as long. Still, for basic chlorine reduction and sediment filtering, it can be enough.

    Best for: beginners, budget buyers, students, renters, and people testing shower filters for the first time.


    3. Detailed Features to Compare

    When choosing a shower filter, do not only look at the price. The best option depends on filtration type, cartridge life, water pressure, and installation.

    Filtration stages: More stages usually mean broader filtration. Look for filters that mention chlorine, sediment, heavy metals, or odor reduction.

    Cartridge life: A cheaper filter is not always cheaper long-term if the cartridge needs frequent replacement.

    Water pressure: Some filters reduce pressure slightly. A good model should filter water without making the shower feel weak.

    Installation: Universal compatibility is important. Most buyers want something they can install without tools.

    Material quality: Chrome-plated plastic is common in budget models. Metal housing may feel more durable but can cost more.

    Replacement availability: Always choose a filter with easy-to-find replacement cartridges.


    4. Pros and Cons

    Pros

    • Helps reduce chlorine smell
    • May make skin feel less dry
    • Can improve hair softness
    • Easy to install
    • Affordable bathroom upgrade
    • Good for renters
    • No major plumbing required

    Cons

    • Replacement cartridges add cost
    • Not all filters remove every impurity
    • Some models may reduce water pressure
    • Cheap filters may wear out faster
    • Results vary depending on local water quality

    5. Buying Guide

    Before buying a shower filter, think about your main problem.

    If your skin feels dry after every shower, choose a multi-stage filter. It gives you the broadest coverage and is usually the safest recommendation for most people.

    If your main concern is hair, especially dryness or frizz, a Vitamin C shower filter may be better. It focuses strongly on chlorine reduction and can make the shower feel gentler.

    If you simply want to test the idea without spending much, start with a basic inline filter. It may not be the most powerful option, but it is affordable and easy to try.

    Also think about how many people use the shower. A filter used by one person will last longer than a filter used by a family. If multiple people shower daily, cartridge life becomes more important.

    Water pressure is another key factor. If your shower already has weak pressure, avoid bulky filters that may restrict flow too much. Look for models that specifically mention high-flow design.

    Finally, check replacement cartridges before buying. A shower filter is not a one-time purchase. It works best when maintained properly. If cartridges are expensive or hard to find, the product becomes less useful over time.


    6. Who Should Buy This

    A shower filter is a smart choice for:

    • People with dry skin after showering
    • People with rough or frizzy hair
    • Renters who want an easy bathroom upgrade
    • Anyone noticing strong chlorine smell
    • Buyers looking for affordable wellness products
    • People who want better water quality without plumbing work

    This is also a strong Amazon review topic because it connects to daily discomfort. People do not search for shower filters randomly. They usually search because they already have a problem they want to fix.

    That makes the buying intent strong.


    7. Final Verdict

    A shower filter under $40 is one of the easiest bathroom upgrades you can make. It is affordable, simple to install, and useful every single day.

    If you want the safest choice, go with a multi-stage shower filter. It works for most people and provides the best balance of value and performance.

    If your main issue is hair dryness or chlorine smell, a Vitamin C shower filter may be the better choice.

    If you are on a tight budget, a basic inline filter is a good starting point.

    The best recommendation for most buyers is a multi-stage shower filter because it offers broad filtration, easy installation, and strong long-term value.

    For under $40, this is a practical product that solves a real daily problem. That is exactly why it works well for product review content: the reader understands the pain, sees the solution clearly, and has a simple reason to click and buy.

  • Best Budget Mechanical Keyboards Under $80 (2026 Guide) – Faster Typing, Better Feel, and Real Upgrade for Daily Use

    Best Budget Mechanical Keyboards Under $80 (2026 Guide) – Faster Typing, Better Feel, and Real Upgrade for Daily Use

    Most people type every single day, but very few think about the tool they use to do it.

    A keyboard is one of those things that gets ignored until it becomes a problem. You might notice your fingers getting tired, your typing feeling inconsistent, or your overall workflow slowing down slightly. At first, it seems like nothing. But over time, those small inefficiencies stack up.

    Here’s the truth:

    👉 A bad keyboard doesn’t just feel uncomfortable—it slows you down.

    Typing is not just about pressing keys. It’s about feedback, speed, accuracy, and consistency. If your keyboard feels mushy or unresponsive, you will naturally type slower. You will make more mistakes. You will lose rhythm.

    This is where mechanical keyboards make a difference.

    Unlike traditional membrane keyboards, mechanical keyboards use individual switches under each key. This creates:

    • more precise feedback
    • faster key response
    • more consistent typing feel

    And the biggest benefit?

    👉 You feel the difference immediately.

    Now, many people assume mechanical keyboards are expensive. That used to be true. But in 2026, there are excellent options under $80 that deliver real performance improvements without requiring a large budget.

    However, there is a problem.

    Not all mechanical keyboards are worth buying.

    Some feel cheap.
    Some use poor switches.
    Some look good but perform badly over time.

    If you choose the wrong one, you end up wasting money and going back to your old keyboard.

    This guide is built differently.

    Instead of listing random products, we will break down:

    • which types actually feel good to type on
    • what features matter for real use
    • which keyboards are worth buying under $80

    If you type daily—whether for work, blogging, gaming, or general use—this is one of the highest ROI upgrades you can make.


    2. Top Picks


    🥇 Best Overall: Hot-Swappable Mechanical Keyboard (75% Layout)

    If you want the best balance between performance, flexibility, and long-term value, this is the one to choose.

    A 75% layout keyboard removes unnecessary keys while keeping essential ones like arrow keys and function row. This creates a more compact design without sacrificing usability.

    The biggest advantage here is hot-swappable switches.

    👉 This means you can change switches without soldering.

    Why does this matter?

    Because switches determine how your keyboard feels. Some people prefer smooth typing. Others want tactile feedback. Some like quiet keys, others like clicky sounds.

    With a hot-swappable keyboard, you’re not locked into one choice.

    You can:

    • replace switches later
    • experiment with different typing feels
    • upgrade without buying a new keyboard

    That flexibility is what makes this type of keyboard so valuable.

    Another key advantage is build quality.

    Many budget keyboards now include:

    • solid frames
    • better stabilizers
    • improved keycaps

    This means the typing experience feels much closer to premium keyboards than it used to.

    Real-world use:

    • blogging → faster typing flow
    • work → more accurate input
    • gaming → better responsiveness

    The only downside is the learning curve of a smaller layout. Some users need a few days to adjust.

    Bottom line:
    This is the best overall choice if you want performance and long-term flexibility.


    🥈 Best for Typing Comfort: Full-Size Mechanical Keyboard (Brown Switches)

    If your main focus is comfort and familiarity, a full-size keyboard with brown switches is the safest option.

    Unlike compact layouts, full-size keyboards include:

    • number pad
    • full key spacing
    • traditional layout

    This makes them easier to transition into if you are coming from a standard keyboard.

    The key feature here is brown switches.

    Brown switches are:

    • tactile (you feel a bump when pressing)
    • relatively quiet
    • balanced for typing and general use

    This makes them ideal for people who type a lot but don’t want loud clicking sounds.

    Why this matters:

    Typing is about rhythm.

    When your keyboard gives consistent feedback, your fingers naturally move faster and more accurately.

    Compared to linear switches (smooth), brown switches provide more control without being distracting.

    Real-world benefits:

    • fewer typing errors
    • more consistent speed
    • comfortable long sessions

    The downside is size.

    Full-size keyboards take up more desk space, which may not fit minimal setups.

    Bottom line:
    Best for traditional users who want a reliable typing experience.


    🥉 Best Budget Pick: 60% Mechanical Keyboard (Compact Entry-Level)

    If you want the cheapest entry into mechanical keyboards, a 60% layout is a strong starting point.

    These keyboards remove:

    • function row
    • arrow keys (or combine them)
    • extra keys

    The result is a very compact design.

    The biggest advantage is space.

    👉 More desk space = more mouse movement + cleaner setup.

    This is especially useful for:

    • small desks
    • gaming setups
    • minimalist workspaces

    Another advantage is price.

    Because these keyboards use fewer materials, they are often cheaper while still offering mechanical switches.

    However, there are trade-offs.

    👉 Missing keys can be frustrating at first
    👉 You need to learn key combinations

    This makes them less beginner-friendly compared to full-size keyboards.

    Still, they convert well because many buyers want something compact and affordable.

    Bottom line:
    Best for budget users who want a compact setup.


    3. What Actually Matters (Before You Buy)

    Most beginners make the same mistake:

    👉 They choose based on looks or RGB.

    That’s not what matters.

    Focus on these instead:

    1. Switch Type

    • Linear → smooth, fast
    • Tactile → balanced (best for typing)
    • Clicky → loud, noticeable

    2. Layout

    • Full-size → familiar
    • 75% → balanced
    • 60% → compact

    3. Build Quality
    Cheap keyboards feel hollow and unstable.

    4. Keycaps
    Better keycaps improve feel and durability.


    4. Pros and Cons

    Pros

    • Faster and more accurate typing
    • Better feedback and feel
    • Long-lasting switches
    • Customizable options
    • Strong value under $80

    Cons

    • Learning curve for smaller layouts
    • Some models can be noisy
    • Cheap builds may feel hollow
    • Not all switches suit everyone

    5. Buying Guide (Simple Decision System)

    Use this:

    • Want best value → 75% hot-swappable keyboard
    • Want comfort → full-size brown switch keyboard
    • Want cheapest → 60% compact keyboard

    Also consider your usage.

    Typing-heavy work → go tactile
    Gaming → go linear
    Mixed use → go balanced


    6. Who Should Buy This

    You should upgrade your keyboard if:

    • you type daily
    • your current keyboard feels slow
    • you want better typing experience
    • you care about productivity

    Even casual users feel the difference immediately.


    7. Final Verdict

    A mechanical keyboard is not just a preference upgrade—it’s a performance upgrade.

    It changes how you interact with your computer.

    Better feedback → better rhythm
    Better rhythm → faster typing
    Faster typing → more efficient work

    For under $80, this is one of the highest ROI upgrades you can make.

    If you choose the right type based on your needs and use it daily, the improvement becomes obvious within days.

    And that’s exactly why this category converts so well.

    Because once people try it, they don’t go back.

  • Best Memory Foam Pillows Under $50 (2026 Guide) – Better Sleep, Neck Support, and Real Comfort Without Overspending

    Best Memory Foam Pillows Under $50 (2026 Guide) – Better Sleep, Neck Support, and Real Comfort Without Overspending

    A pillow may look like a small purchase, but it can affect your sleep quality more than most people realize. Many people spend money on a mattress, blankets, or bedroom decor, but they keep using an old pillow that no longer supports their neck properly. That is a mistake.

    If you wake up with neck pain, shoulder stiffness, headaches, or general tiredness, your pillow could be one of the main reasons. A poor pillow forces your neck into an unnatural position for hours. Even if you fall asleep quickly, your body may not fully relax because your spine is not properly aligned.

    This is exactly why memory foam pillows have become so popular. Unlike traditional soft pillows that collapse during the night, memory foam adapts to the shape of your head and neck. It provides pressure relief while still offering structure. That balance is important because a pillow should not be too soft or too firm. It should support your sleeping position without creating pressure points.

    The good news is that you do not need to spend a premium price to get a better pillow. In 2026, there are many memory foam pillows under $50 that offer solid comfort, support, and durability for everyday use. The key is choosing the right type based on how you sleep.

    This guide will help you understand what actually matters before buying. We will compare different pillow types, explain who each one is best for, and show why the right pillow can make a real difference in your nightly routine.


    2. Top Picks


    Best Overall: Contour Memory Foam Pillow

    A contour memory foam pillow is the best overall choice for most people because it is specifically designed to support the natural curve of the neck. Instead of being flat like a traditional pillow, it has a raised edge and lower center area. This shape helps keep your head, neck, and spine in better alignment while you sleep.

    This is especially useful for people who wake up with neck stiffness. When your pillow is too low, your neck bends downward. When it is too high, your neck bends upward. Both positions create tension. A contour pillow reduces that problem by giving your neck a more stable resting position.

    For side sleepers, the raised edge helps fill the space between the shoulder and head. For back sleepers, the center dip helps cradle the head without pushing it too far forward. This makes it more versatile than many standard pillows.

    The main reason this type converts well as an Amazon review topic is simple: it solves a painful problem. People searching for memory foam pillows are often not browsing casually. They are trying to fix discomfort. That means they already have buying intent.

    The only downside is adjustment time. If you have used soft pillows for years, a contour pillow may feel unusual for the first few nights. However, many users find that once their body adjusts, it becomes difficult to return to a regular pillow.

    Recommendation: Choose this if you want better neck support, improved spinal alignment, and a pillow that feels more structured than traditional options.


    Best for Side Sleepers: High-Loft Memory Foam Pillow

    Side sleepers need more support than back sleepers because there is a larger gap between the head and mattress. If the pillow is too thin, the head drops downward and the neck bends. This can create shoulder pressure, neck pain, and poor sleep quality.

    A high-loft memory foam pillow solves this by providing extra height. The goal is to keep your head level with your spine. When alignment is correct, your body can relax more naturally.

    This type of pillow is especially useful for people with broader shoulders. A standard pillow may not provide enough lift, but a thicker memory foam pillow can fill the space better. That creates a more stable sleeping position.

    Compared to contour pillows, high-loft pillows feel more familiar because they look and function more like traditional pillows. This makes them easier to adapt to for many users.

    However, this pillow is not ideal for stomach sleepers. Too much height can push the neck backward and create strain. That is why matching pillow height to sleeping style is important.

    Recommendation: Choose this if you mainly sleep on your side and often feel shoulder or neck discomfort in the morning.


    Best for Hot Sleepers: Cooling Gel Memory Foam Pillow

    One of the most common complaints about memory foam is heat retention. Traditional memory foam can trap warmth, which may feel uncomfortable for people who sleep hot. A cooling gel memory foam pillow is designed to reduce that issue.

    These pillows usually include a gel layer, breathable cover, or ventilated foam structure. The goal is to improve airflow and help the pillow feel cooler throughout the night.

    This type is a strong choice for people who wake up sweating or frequently flip their pillow to find the cool side. Instead of only focusing on support, it combines comfort with temperature control.

    Compared to regular memory foam pillows, cooling gel models may feel slightly firmer. This is not always a bad thing. Firmer support can help maintain alignment better, especially for back and side sleepers.

    The important thing to remember is that no pillow stays ice-cold all night. Cooling pillows are not air conditioners. They simply manage heat better than standard foam options.

    Recommendation: Choose this if you like the support of memory foam but dislike feeling hot while sleeping.


    3. Detailed Features to Compare

    When choosing a memory foam pillow, do not only look at price. The best pillow depends on support, shape, firmness, cooling ability, and sleeping position.

    Support: The pillow should keep your neck aligned with your spine. This is the most important feature.

    Firmness: Softer pillows feel comfortable at first but may collapse too much. Firmer pillows provide better structure but can feel less plush.

    Loft: Loft means pillow height. Side sleepers usually need higher loft. Back sleepers usually need medium loft. Stomach sleepers need low loft.

    Cooling: If you sleep hot, look for gel-infused foam, breathable covers, or ventilation holes.

    Cover: A removable and washable cover makes the pillow easier to maintain.

    Durability: Cheap foam may flatten quickly. Better memory foam should hold its shape for a longer time.


    4. Pros and Cons

    Pros

    • Provides better neck support than many basic pillows
    • Helps improve spinal alignment
    • Reduces pressure around the head and shoulders
    • Good options available under $50
    • Works well for many back and side sleepers
    • Can improve sleep comfort without replacing your mattress

    Cons

    • Some models feel too firm at first
    • Traditional memory foam may retain heat
    • Not every shape works for every sleeping position
    • May require a few nights to adjust
    • Cheap models may lose shape faster

    5. Buying Guide

    Before buying a memory foam pillow, start with your sleeping position.

    If you sleep on your side, choose a higher pillow with enough structure to support the space between your shoulder and head. A thin pillow will not be enough.

    If you sleep on your back, choose a medium-height pillow that supports your neck without pushing your head forward. Contour pillows are often excellent for this.

    If you sleep on your stomach, be careful. Many memory foam pillows are too thick for stomach sleeping. You may need a low-loft option.

    Next, think about temperature. If you often feel hot at night, do not buy basic dense memory foam. Choose a cooling gel or ventilated design instead.

    Then consider firmness. If you want strong support, go firmer. If you want a softer feel, look for shredded memory foam, which is more adjustable and less rigid.

    Also, check the cover. A washable cover matters because pillows collect sweat, oils, and dust over time. A removable cover makes maintenance much easier.

    Finally, do not buy only based on appearance. A pillow can look premium but still fail if it does not match your sleeping style.

    The best memory foam pillow is not the most expensive one. It is the one that supports your body correctly every night.


    6. Who Should Buy This

    A memory foam pillow is a smart choice for:

    • Side sleepers who need more neck support
    • Back sleepers who want better alignment
    • People waking up with neck stiffness
    • Hot sleepers looking for cooling pillow options
    • Anyone replacing an old flat pillow
    • Buyers who want better sleep without spending over $50

    This is also a strong Amazon review topic because it targets a real daily problem. Sleep products usually convert well because buyers already understand the pain point. They are not buying for fun. They are buying because they want better rest.


    7. Final Verdict

    A memory foam pillow under $50 can be one of the simplest upgrades for better sleep. It is affordable, practical, and easy to understand. More importantly, it solves a problem many people experience every day.

    If you want the safest recommendation, choose a contour memory foam pillow. It offers strong neck support and works well for many back and side sleepers.

    If you sleep mostly on your side, a high-loft memory foam pillow may be better because it gives extra height and shoulder support.

    If you often feel hot at night, choose a cooling gel memory foam pillow instead of basic foam.

    The key is not to buy randomly. Match the pillow to your sleep style.

    A better pillow will not fix every sleep problem, but it can remove one major source of discomfort. For under $50, that makes it a very reasonable purchase.

    Best overall recommendation: Contour memory foam pillow.
    Best for side sleepers: High-loft memory foam pillow.
    Best for hot sleepers: Cooling gel memory foam pillow.

  • Best Bedside Lamps Under $50 (2026 Guide) – Improve Sleep, Comfort, and Nighttime Routine

    Best Bedside Lamps Under $50 (2026 Guide) – Improve Sleep, Comfort, and Nighttime Routine

    Most people don’t think much about their bedside lamp.

    It’s just something that sits next to the bed. You turn it on at night, turn it off before sleeping, and that’s it. But what most people don’t realize is that lighting at night has a direct impact on how you feel, how you relax, and even how well you sleep.

    Think about your nightly routine.

    You’re winding down after a long day. Maybe you’re scrolling your phone, reading, or just trying to relax. The environment around you matters more than you think. Harsh lighting keeps your brain active. Poor lighting makes simple things like reading uncomfortable. Too little light strains your eyes.

    And this is where a good bedside lamp makes a real difference.

    It’s not just about light—it’s about control.

    The right lamp allows you to:

    • create a calm, warm environment
    • reduce eye strain at night
    • make your routine smoother
    • improve how quickly you relax

    Now here’s the key point:

    👉 You don’t need an expensive lamp to get this right.

    In 2026, there are excellent bedside lamps under $50 that include features like:

    • adjustable brightness
    • touch controls
    • warm and cool lighting modes
    • compact, modern designs

    These features used to be considered premium. Now they’re standard in budget-friendly options.

    But here’s where people go wrong.

    They choose based on looks alone.

    They buy something that looks nice but doesn’t perform well. The brightness is wrong. The controls are annoying. The light feels uncomfortable. And eventually, they stop using it properly.

    This guide is designed to prevent that.

    Instead of focusing on appearance, we focus on real-world use—what actually works, what improves your routine, and what makes you want to use the product every day.

    If you want a simple upgrade that improves your nights without overthinking it, this is one of the easiest and most effective changes you can make.


    2. Top Picks


    🥇 Best Overall: Touch Control Bedside Lamp

    If you want something simple, effective, and easy to use every day, this is the best choice.

    Touch control bedside lamps are popular because they remove one of the most annoying problems with traditional lamps:

    👉 searching for a switch in the dark.

    Instead of reaching around awkwardly, you simply tap the lamp to turn it on or adjust brightness. This small detail makes a huge difference in real use, especially when you’re half-asleep or waking up at night.

    Another major advantage is adjustable brightness.

    Good models allow you to switch between low, medium, and high brightness levels. This is important because nighttime lighting needs to be flexible.

    • low brightness → relaxing, winding down
    • medium → casual use
    • high → reading or tasks

    This adaptability makes the lamp useful in multiple situations.

    The light quality also matters.

    Most good bedside lamps focus on warm light tones, which are easier on the eyes and better suited for nighttime use. Harsh white light can disrupt your ability to relax, while warm light helps create a calm environment.

    Real-world benefits:

    • easier nighttime use
    • more comfortable lighting
    • smoother daily routine

    The only downside is that touch controls can be slightly sensitive. But most users adjust quickly.

    Bottom line:
    If you want a simple, high-impact upgrade, this is the best overall option.


    🥈 Best for Reading: Adjustable Arm Bedside Lamp

    If you read in bed regularly, this is the better choice.

    Adjustable arm lamps are designed for focused lighting. Instead of lighting up the entire room, they direct light exactly where you need it.

    This solves a common problem.

    👉 general lamps spread light too widely.

    That’s fine for ambiance, but not ideal for reading. You either get too much light in your eyes or not enough on the page.

    An adjustable lamp fixes this by allowing you to position the light precisely.

    Another advantage is reduced eye strain.

    By focusing light on your book or device, you create a clearer visual area without overwhelming your surroundings.

    Real-world use:

    • reading books
    • studying in bed
    • focused nighttime tasks

    These lamps are also useful if you share a bed.

    You can direct light without disturbing the other person.

    The trade-off is that they are less aesthetic compared to ambient lamps. They are functional first, decorative second.

    Bottom line:
    Best for readers who want focused, practical lighting.


    🥉 Best Budget Option: Basic LED Bedside Lamp

    If your goal is to spend as little as possible, this is the entry-level option.

    Basic LED bedside lamps focus on core functionality:

    • simple on/off control
    • consistent light output
    • low cost

    They don’t include advanced features, but they still improve your environment compared to poor lighting setups.

    This is important.

    👉 Even a simple lamp is better than bad lighting.

    However, there are limitations.

    • no brightness adjustment
    • basic design
    • limited flexibility

    This means they are best for users who want something quick and functional.

    Still, they serve a purpose.

    Some users don’t need advanced features—they just want light.

    Bottom line:
    Good for basic use, but limited compared to better options.


    3. What Actually Matters (Before You Buy)

    Most people overlook these:

    1. Light Temperature
    Warm light is better for nighttime use.

    2. Brightness Control
    Adjustable light makes a huge difference.

    3. Ease of Use
    If it’s annoying to use, you won’t use it properly.

    4. Purpose

    • relaxing → ambient lamp
    • reading → adjustable lamp

    4. Pros and Cons

    Pros

    • improves nighttime comfort
    • reduces eye strain
    • enhances relaxation
    • affordable upgrade
    • easy to use daily

    Cons

    • cheap models lack features
    • some designs prioritize looks over function
    • limited brightness in smaller lamps
    • requires correct placement

    5. Buying Guide (Simple Decision System)

    Use this:

    • everyday use → touch lamp
    • reading → adjustable arm lamp
    • low budget → basic LED lamp

    Also think about your routine.

    If you use it every night, invest slightly more.


    6. Who Should Buy This

    You should consider this if:

    • you use your phone or read at night
    • your current lighting feels uncomfortable
    • you want a better nighttime routine
    • you value small comfort upgrades

    7. Final Verdict

    A bedside lamp is a small product with a surprisingly large impact.

    It affects how you relax.
    It affects how you wind down.
    It affects how comfortable your nights feel.

    And that matters more than most people think.

    For under $50, this is an easy upgrade that improves your daily routine immediately.

    The key is choosing the right type based on how you use it.

    Once you do, it becomes something you rely on every night without thinking.

    And that’s exactly what makes it worth it.

  • Best Standing Desk Converters Under $120 (2026 Guide) – Work Healthier Without Replacing Your Desk

    Best Standing Desk Converters Under $120 (2026 Guide) – Work Healthier Without Replacing Your Desk

    Sitting for long hours has quietly become one of the biggest problems in modern work.

    Most people don’t notice it at first. You sit down, open your laptop, and start working. Everything feels normal. But after a few hours, your energy drops. Your posture starts to collapse. Your back feels tight. You lose focus faster than you should.

    The issue isn’t just comfort.

    👉 It’s how your body is being used.

    When you sit for extended periods, your muscles stay inactive, your circulation slows down, and your posture naturally shifts into a less efficient position. Over time, this leads to fatigue, discomfort, and reduced productivity.

    This is why standing desks became popular.

    But here’s the problem:

    👉 Full standing desks are expensive and not always practical.

    They require replacing your entire setup, which costs money, takes time, and isn’t always possible in smaller spaces.

    This is exactly where standing desk converters come in.

    Instead of replacing your desk, you upgrade it.

    A standing desk converter sits on top of your existing desk and allows you to switch between sitting and standing in seconds. That flexibility makes a huge difference in how you feel throughout the day.

    You don’t have to stand all the time.

    In fact, the real benefit comes from switching positions:

    • sit when you want to relax
    • stand when you want energy
    • move naturally throughout the day

    That movement alone improves:

    • focus
    • posture
    • energy levels
    • long-term comfort

    And the best part?

    👉 You don’t need to spend a lot.

    In 2026, there are solid standing desk converters under $120 that deliver real value—if you choose the right one.

    But not all converters are the same.

    Some are unstable.
    Some are too small.
    Some are difficult to adjust.

    Choosing the wrong one leads to frustration—and most people stop using it.

    This guide is designed to prevent that.

    We’re not just listing options. We’re breaking down what actually works, what to avoid, and which type fits your workflow.

    If you want a simple upgrade that improves how you work every day, this is one of the most effective tools you can add to your setup.


    2. Top Picks


    🥇 Best Overall: Gas-Spring Standing Desk Converter

    If you want the best balance between ease of use, stability, and performance, this is the one to choose.

    Gas-spring standing desk converters are popular because they solve the biggest problem with height-adjustable setups:

    👉 effort.

    Instead of manually adjusting the height, these converters use a gas-spring mechanism that allows you to lift and lower the desk smoothly with minimal force.

    This makes a huge difference in daily use.

    You don’t hesitate to adjust your position. You don’t feel resistance. You simply move between sitting and standing naturally.

    That ease of use is what turns a good product into something you actually use consistently.

    Another major advantage is stability.

    Good gas-spring models are designed with a strong base and balanced lifting system, which keeps your monitor and keyboard steady even at higher positions.

    Real-world benefits:

    • smooth transitions between positions
    • stable typing and screen viewing
    • reduced friction in your workflow

    Most models also include a separate keyboard tray, which helps maintain proper ergonomic positioning.

    The only downside is size.

    These converters take up more desk space than simpler models. But for most users, the improvement in usability is worth it.

    Bottom line:
    If you want a long-term, reliable solution, this is the best overall choice.


    🥈 Best for Small Spaces: Compact Standing Desk Converter

    If your desk space is limited, a compact converter is the better option.

    These models are designed for smaller setups, making them ideal for:

    • apartments
    • shared workspaces
    • minimal desk environments

    The biggest advantage is space efficiency.

    Unlike larger converters, these don’t overwhelm your desk. They provide just enough surface area for a laptop or single monitor without creating clutter.

    Another benefit is simplicity.

    Compact models are easier to set up, easier to move, and often lighter than full-size converters.

    However, there are trade-offs.

    👉 Limited workspace
    👉 Not ideal for dual monitors
    👉 Less surface area for accessories

    This means they are best suited for users with simple setups.

    Real-world use:

    • laptop users
    • single-monitor setups
    • casual or part-time work

    Bottom line:
    Best for minimal setups and limited space.


    🥉 Best Budget Option: Fixed Height Desk Riser

    If you want the most affordable way to try a standing setup, this is where you start.

    Fixed height desk risers are simple platforms that elevate your workspace to a standing position.

    They don’t adjust. They don’t move. They simply provide height.

    The main advantage is cost.

    These are significantly cheaper than adjustable converters, making them accessible for users who are not ready to invest more.

    They also require no setup or mechanism—just place and use.

    But there are clear limitations.

    👉 No height adjustment
    👉 Less ergonomic flexibility
    👉 Not ideal for shared use

    This means you need to be confident that the height works for you.

    Still, they serve a purpose.

    Some users don’t need full flexibility—they just want a basic standing option.

    Bottom line:
    Good for testing standing work, but limited long-term.


    3. What Actually Matters (Before You Buy)

    Most people choose based on price or appearance. That’s a mistake.

    Focus on these:

    1. Adjustment Mechanism
    If it’s hard to adjust, you won’t use it.

    2. Stability
    A shaky desk kills productivity instantly.

    3. Surface Size
    Make sure it fits your setup (laptop vs dual monitors).

    4. Frequency of Use
    Daily use requires better quality.


    4. Pros and Cons

    Pros

    • Reduces long sitting time
    • Improves posture
    • Increases energy during work
    • Flexible sit/stand workflow
    • No need to replace your desk

    Cons

    • Takes up desk space
    • Good models cost more
    • Some require setup
    • Cheap models may lack stability

    5. Buying Guide (Simple Decision System)

    Use this:

    • Daily work + best experience → Gas-spring converter
    • Small desk → Compact converter
    • Low budget → Fixed riser

    Also consider your work style.

    If you switch positions often, invest in smooth adjustment.


    6. Who Should Buy This

    You should consider this if:

    • You sit more than 4 hours daily
    • You feel low energy during work
    • Your posture is getting worse
    • You want a healthier workflow

    These are clear signs your setup needs improvement.


    7. Final Verdict

    A standing desk converter is not about standing all day.

    It’s about flexibility.

    It gives you the option to move, adjust, and stay comfortable throughout your workday.

    And that flexibility creates better results:

    • more focus
    • less fatigue
    • better posture

    For under $120, this is one of the most impactful upgrades you can make without changing your entire setup.

    Choose the right type based on your space and usage.

    Once you start using it consistently, you’ll understand why this category continues to grow.

    Because it solves a real problem—and makes daily work feel better.

  • Best Phone Tripods Under $40 (2026 Guide) – Shoot Better Photos and Videos Instantly

    Best Phone Tripods Under $40 (2026 Guide) – Shoot Better Photos and Videos Instantly

    Most people don’t realize how much better their photos and videos could look with one simple upgrade.

    They focus on the phone. They think about camera quality, megapixels, or editing apps. But they ignore the most basic problem:

    👉 stability.

    If your hands are slightly shaking, your videos look unprofessional. If your angle is off, your photos don’t feel intentional. If you’re constantly adjusting your phone, the entire process becomes frustrating.

    This is where a phone tripod changes everything.

    It removes inconsistency.

    Instead of trying to hold your phone perfectly still, you create a fixed, stable setup. That one change immediately improves:

    • video quality
    • framing
    • lighting control
    • overall professionalism

    And here’s the key:

    👉 It doesn’t require skill.

    You don’t need to be a photographer or content creator. The tripod does the work for you by creating stability and repeatability.

    In 2026, phone tripods under $40 are more capable than ever. Many include features like:

    • flexible legs
    • adjustable height
    • Bluetooth remote control
    • 360-degree rotation

    This means you can create content, take photos, or even join video calls with a much better setup—without spending much money.

    But here’s the problem:

    Not all tripods are worth buying.

    Some are too weak and fall over.
    Some can’t hold heavier phones.
    Some have poor joints that loosen over time.

    Choosing the wrong one leads to frustration, and most people stop using it.

    This guide is built to avoid that.

    We’re not just listing options—we’re breaking down what actually works in real-world use and which type fits your situation.

    If you want an easy upgrade that instantly improves your photos, videos, and overall setup, this is one of the simplest tools you can buy.


    2. Top Picks


    🥇 Best Overall: Flexible Tripod (Gorilla-Style Design)

    If you want one tripod that works almost anywhere, this is the best option.

    Flexible tripods—often called Gorilla-style—are extremely popular because they solve a major limitation of traditional tripods:

    👉 surface dependency.

    With a normal tripod, you need a flat surface. With a flexible tripod, you can:

    • wrap it around poles
    • attach it to railings
    • secure it to branches
    • place it on uneven surfaces

    This opens up a huge range of shooting possibilities.

    Another key advantage is portability.

    These tripods are compact and lightweight, making them easy to carry in a bag or even a pocket. This makes them perfect for travel, outdoor use, or casual shooting.

    Stability is also surprisingly good—if you choose a quality model.

    The flexible legs grip surfaces securely, reducing movement and improving shot consistency.

    Real-world use:

    • filming content outdoors
    • taking group photos
    • recording videos hands-free
    • creating stable shots on uneven terrain

    The only downside is height.

    Flexible tripods are usually shorter than standard tripods, so they are not ideal for full-height filming unless placed on a surface.

    Bottom line:
    Best all-around option for flexibility and real-world use.


    🥈 Best for Height and Stability: Extendable Tripod Stand

    If your priority is height and stability, this is the better choice.

    Extendable tripods are designed for:

    • standing shots
    • full-body framing
    • stable indoor filming

    The biggest advantage is adjustable height.

    You can extend the tripod to eye level or higher, which is essential for:

    • recording videos
    • taking professional-looking photos
    • video calls with proper framing

    Another benefit is stability.

    Compared to flexible tripods, these models have stronger legs and a wider base, which reduces movement and improves overall balance.

    Many models also include a Bluetooth remote, allowing you to take photos or start recording without touching your phone.

    However, there is a trade-off.

    👉 Less portable.

    These tripods are larger and require more space, making them less convenient for travel.

    Bottom line:
    Best for indoor setups, content creation, and stable shooting.


    🥉 Best Budget Option: Mini Tabletop Tripod

    If you want something simple and affordable, this is the entry-level option.

    Mini tabletop tripods are small, lightweight, and easy to use. They are designed for basic tasks like:

    • video calls
    • watching content
    • simple recordings

    The main advantage is simplicity.

    No setup. No complexity. Just place your phone and use it.

    They are also extremely portable, making them easy to carry anywhere.

    However, there are clear limitations.

    👉 Limited height
    👉 Less stability
    👉 Not suitable for advanced use

    This means they are best for casual users, not content creators.

    Still, they serve an important purpose.

    Some users don’t need a full tripod—they just need something better than holding their phone.

    Bottom line:
    Good for basic use, but not for serious shooting.


    3. What Actually Matters (Before You Buy)

    Most people focus on features. That’s not what matters.

    Focus on this:

    1. Stability
    If it moves, it ruins your content.

    2. Height vs Portability
    You can’t have both fully—choose based on your needs.

    3. Phone Grip Quality
    Weak holders = dropped phones.

    4. Real Usage Scenario

    • Outdoor → flexible
    • Indoor → extendable
    • Casual → mini

    4. Pros and Cons

    Pros

    • Improves photo and video quality instantly
    • Enables hands-free use
    • Increases stability and consistency
    • Affordable upgrade
    • Useful for multiple situations

    Cons

    • Larger models reduce portability
    • Cheap models may break easily
    • Setup required for some types
    • Not all models support heavy phones

    5. Buying Guide (Simple Decision System)

    Use this:

    • Want flexibility → Flexible tripod
    • Want height/stability → Extendable tripod
    • Want simple solution → Mini tripod

    Also think about how often you’ll use it.

    Daily use = better quality
    Occasional use = budget is fine


    6. Who Should Buy This

    You should consider this if:

    • You take photos regularly
    • You record videos or content
    • You join video calls often
    • You want better framing and stability

    Even casual users benefit from this.


    7. Final Verdict

    A phone tripod is one of the simplest tools that creates immediate improvement.

    It doesn’t change your phone.

    It changes how you use it.

    And that’s enough to:

    • improve quality
    • reduce frustration
    • create better results

    For under $40, this is a low-risk, high-impact upgrade.

    If you choose the right type for your needs and actually use it, the difference is obvious from the first use.

    Better stability.
    Better angles.
    Better results.

    That’s why this category continues to convert so well.

    Because it solves a real problem—instantly.

  • Best Meal Prep Containers Under $25 (2026 Guide) – Save Time, Eat Better, and Stay Consistent

    Best Meal Prep Containers Under $25 (2026 Guide) – Save Time, Eat Better, and Stay Consistent

    Most people don’t fail at eating healthy because they don’t know what to eat.

    They fail because their system is broken.

    Think about a typical day. You start with good intentions. Maybe you even plan to eat clean. But then time runs out. You get busy, you get tired, and suddenly convenience becomes the priority. That’s when takeout, fast food, or random meals take over.

    This is not a discipline problem.
    It’s a structure problem.

    When your environment doesn’t support your goal, consistency becomes almost impossible.

    This is exactly why meal prep has become so popular.

    Instead of deciding what to eat multiple times a day, you make that decision once—and remove friction for the rest of the week.

    And at the center of that system is something very simple:

    👉 your meal prep containers.

    Most people underestimate this.

    They think any container will work. But in reality, poor containers lead to:

    • leaks in your bag
    • food mixing together
    • wasted space in your fridge
    • frustration that breaks the habit

    Once that happens, people stop prepping altogether.

    A good set of meal prep containers fixes this immediately.

    It keeps your food organized, portable, and ready to go. That one change makes it easier to stick to your plan—and consistency is what actually creates results.

    In 2026, you don’t need to spend much to get quality containers. Under $25, there are excellent options that are durable, leak-resistant, and designed specifically for real daily use.

    But not all containers are equal.

    Some are too flimsy.
    Some leak.
    Some don’t stack well.

    Choosing the wrong one will cost you more time than it saves.

    This guide is designed to help you avoid that.

    We’re not just listing products—we’re breaking down what actually works in real life and which type fits your routine.

    If you want to eat better without overthinking it, this is one of the simplest systems you can build.


    2. Top Picks


    🥇 Best Overall: 3-Compartment Meal Prep Containers

    If you want something that works for most people, this is the best choice.

    3-compartment meal prep containers are popular because they solve one of the biggest problems in meal prep:

    👉 keeping food separated.

    Instead of everything mixing together, you can divide your meals into sections—protein, carbs, and vegetables. This makes meals look cleaner, more organized, and easier to portion correctly.

    This matters more than people think.

    When food looks organized, you’re more likely to stick to your plan. When everything is mixed together, it becomes less appealing—and that’s when people fall off.

    Another major advantage is portion control.

    These containers naturally guide how much you eat. You don’t need to measure everything perfectly because the sections already create balance.

    Real-world use:

    • gym users tracking macros
    • busy professionals preparing lunches
    • anyone trying to eat consistently

    Stackability is another key feature.

    Good containers stack neatly in your fridge, saving space and keeping everything organized. This makes your entire setup feel cleaner and easier to manage.

    The only downside is that they are slightly bulkier compared to single-compartment containers. But for most people, the organization benefit outweighs this.

    Bottom line:
    If you want a structured, easy-to-follow meal prep system, this is the best option.


    🥈 Best for Storage Efficiency: Stackable Single-Compartment Containers

    If your priority is maximizing space and flexibility, this is the better choice.

    Single-compartment containers are simpler, but they offer more freedom in how you use them.

    Instead of being locked into sections, you can store:

    • full meals
    • large portions
    • snacks
    • leftovers

    This flexibility makes them ideal for people who don’t follow strict meal structures.

    Another major advantage is space efficiency.

    These containers stack tightly, which allows you to fit more meals into your fridge without clutter.

    For smaller kitchens or shared spaces, this becomes very important.

    They are also easier to clean compared to multi-compartment containers.

    However, there is a trade-off.

    👉 No separation means food can mix together.

    For some people, this doesn’t matter. For others, it reduces meal quality and satisfaction.

    Bottom line:
    Best for flexible meal prep and efficient storage.


    🥉 Best Budget Option: Basic Disposable-Style Meal Prep Containers

    If your goal is to spend as little as possible, this is the entry-level option.

    These containers are widely used because they are:

    • extremely affordable
    • lightweight
    • easy to replace

    They are often sold in bulk, which makes them practical for short-term use.

    This is especially useful for:

    • beginners testing meal prep
    • people who don’t want to worry about losing containers
    • short-term meal planning

    However, there are clear limitations.

    👉 They are less durable
    👉 Lids may not seal as tightly
    👉 Long-term use can lead to wear and tear

    This doesn’t make them bad—it just defines their role.

    They are a starting point, not a long-term solution.

    Bottom line:
    Good for testing the habit, but not ideal for long-term consistency.


    3. What Actually Matters (Before You Buy)

    Most people overlook this.

    Focus on these four things:

    1. Leak Resistance
    If your container leaks once, you lose trust in it.

    2. Stackability
    A messy fridge kills consistency.

    3. Durability
    Cheap plastic breaks habits quickly.

    4. Size and Portion Fit
    Too small = frustrating
    Too big = wasted space


    4. Pros and Cons

    Pros

    • Saves time during the week
    • Improves consistency in eating habits
    • Reduces food spending
    • Keeps meals organized
    • Supports fitness and health goals

    Cons

    • Requires initial preparation time
    • Needs cleaning and maintenance
    • Cheap containers wear out faster
    • Storage space needed in fridge

    5. Buying Guide (Simple Decision System)

    Use this:

    • Structured meals → 3-compartment containers
    • Flexible meals → single compartment
    • Lowest budget → basic plastic containers

    Also consider how often you prep.

    If you prep weekly, invest in better quality.
    If you prep occasionally, budget is fine.


    6. Who Should Buy This

    This is ideal for:

    • gym users
    • busy professionals
    • students
    • anyone trying to eat healthier
    • people who want to save money on food

    If you struggle with consistency, this directly helps.


    7. Final Verdict

    Meal prep containers are not just storage—they are part of a system.

    They remove daily decision-making.

    They reduce friction.

    They make good habits easier to follow.

    And that’s what actually matters.

    For under $25, this is one of the highest ROI purchases you can make for your routine.

    If you choose the right type and use it consistently, you’ll notice the difference within days—not weeks.

    Better organization.
    Better consistency.
    Better results.

    That’s why this category continues to perform so well.

    Because it solves a real problem—simply and effectively.

  • Best Portable Fans Under $30 (2026 Guide) – Stay Cool Anywhere Without Overpaying

    Best Portable Fans Under $30 (2026 Guide) – Stay Cool Anywhere Without Overpaying

    Heat is one of the most underestimated productivity killers.

    When the temperature rises, everything feels harder. You lose focus faster, your energy drops, and even simple tasks feel uncomfortable. Whether you are working at a desk, commuting, traveling, or trying to relax at home, heat creates constant friction that most people simply tolerate instead of fixing.

    Now here’s the reality:

    👉 You don’t always have control over your environment.

    You can’t always adjust the air conditioning. You can’t always sit in a perfectly cooled room. And if you’re outside or moving around, you’re completely dependent on the weather.

    This is exactly where portable fans become useful—not as a luxury, but as a practical everyday tool.

    A good portable fan solves a very simple problem:
    👉 it gives you control over your personal space.

    Instead of relying on the environment, you create your own airflow.

    That small change can:

    • make long work sessions more comfortable
    • reduce fatigue caused by heat
    • improve focus and consistency
    • make travel and commuting more manageable

    And here’s the important part:

    👉 You don’t need to spend a lot.

    In 2026, portable fans under $30 are surprisingly effective. Many models now include strong airflow, rechargeable batteries, multiple speed settings, and compact designs that fit easily into your daily routine.

    However, not all portable fans are worth buying.

    Some are too weak.
    Some have poor battery life.
    Some are noisy or unstable.

    Choosing the wrong one leads to frustration quickly—and most people stop using it altogether.

    This guide is built differently.

    Instead of just listing features, we focus on what actually matters in real use. What works, what doesn’t, and which type fits your situation.

    If you want a simple upgrade that makes hot days easier to handle, this is one of the easiest and most affordable improvements you can make.


    2. Top Picks


    🥇 Best Overall: Rechargeable USB Desk Fan

    If you want one option that works in most situations, this is it.

    A rechargeable USB desk fan is the most balanced choice under $30 because it combines power, portability, and convenience without unnecessary complexity.

    The biggest advantage is consistent airflow.

    Unlike handheld fans that require constant movement, a desk fan provides continuous cooling. You place it in front of you, adjust the angle, and let it run.

    This is especially useful for:

    • working at a desk
    • studying for long hours
    • using a laptop in warm environments

    Another key benefit is adjustable speed settings.

    Most models include 2–3 speed levels, allowing you to control airflow based on your environment. Low speed for quiet use, higher speed for stronger cooling.

    Battery life is also practical.

    Many rechargeable models last several hours on a single charge, which means you can use them throughout a work session without worrying about constant recharging.

    Noise level is another important factor.

    Good desk fans are designed to be quiet enough for work environments. You don’t want a fan that becomes a distraction while you’re trying to focus.

    The only downside is that it’s not designed for movement. It works best when placed on a desk or stable surface.

    Bottom line:
    If you want reliable, everyday cooling without effort, this is the best overall choice.


    🥈 Best for Travel: Foldable Handheld Fan

    If you’re often on the move, portability becomes the priority.

    Foldable handheld fans are designed for mobility. They are compact, lightweight, and easy to carry in a bag or even a pocket.

    This makes them ideal for:

    • commuting
    • walking outside
    • traveling
    • waiting in lines or crowded areas

    The biggest advantage is flexibility.

    You can use it as a handheld fan or place it on a surface if it includes a foldable base.

    This versatility makes it more useful than it looks at first.

    However, there’s an important trade-off.

    👉 Airflow is usually weaker than desk fans.

    Because of their size, they can’t generate the same level of cooling power. But they compensate with convenience.

    Battery life is decent but varies depending on speed usage.

    Higher speed = faster battery drain.

    Still, for short-term cooling during movement, they perform well.

    Bottom line:
    If you need cooling while moving, this is the most practical option.


    🥉 Best Budget Option: Basic Battery-Powered Mini Fan

    If your goal is to spend as little as possible, a basic mini fan is a simple starting point.

    These models focus on core functionality:

    • basic airflow
    • simple controls
    • low cost

    They are easy to use and require no setup.

    However, expectations need to be realistic.

    👉 Airflow is limited
    👉 Build quality is lower
    👉 Battery life is shorter

    That doesn’t make them useless—it just defines their role.

    They are best for:

    • occasional use
    • emergency situations
    • testing whether a fan improves your comfort

    This is important from a buying perspective.

    Some users are not ready to invest. They just want something cheap that works.

    This category exists for that exact reason.

    Bottom line:
    Good for basic use, but not a long-term solution.


    3. What Actually Matters (Before You Buy)

    Most people choose based on looks. That’s a mistake.

    Focus on these instead:

    1. Airflow Strength
    If the fan is too weak, you won’t use it.

    2. Battery Life
    Short battery = constant frustration

    3. Noise Level
    Too loud = distraction during work

    4. Portability vs Power

    • Small = portable
    • Larger = stronger airflow

    Choose based on your lifestyle, not appearance.


    4. Pros and Cons

    Pros

    • Immediate cooling anywhere
    • Improves comfort in hot environments
    • Portable and easy to use
    • Affordable options available
    • Useful for both indoor and outdoor use

    Cons

    • Limited cooling compared to air conditioning
    • Requires charging or batteries
    • Cheap models may lack durability
    • Smaller fans have weaker airflow

    5. Buying Guide (Simple Decision System)

    Use this quick system:

    • Working at a desk → USB desk fan
    • Moving/traveling → Handheld fan
    • Lowest budget → Mini fan

    Also think about how often you’ll use it.

    If it’s daily use, don’t go for the cheapest option.
    If it’s occasional, budget is fine.


    6. Who Should Buy This

    You should consider this if:

    • You work in a warm environment
    • You commute or travel often
    • You struggle with heat during long sessions
    • You want a simple comfort upgrade

    Even small improvements in comfort can make a big difference in daily productivity.


    7. Final Verdict

    A portable fan is one of those products that seems small—but becomes essential once you start using it.

    It doesn’t completely change your environment.

    But it changes how you experience it.

    And that’s enough.

    For under $30, you’re not buying luxury.
    You’re removing a daily source of discomfort.

    The key is choosing the right type:

    • Desk use → stable fan
    • Travel → compact fan
    • Budget → basic model

    Start simple. Choose based on your routine.

    Once you use it consistently, you’ll understand why this category continues to sell well.

    Because it solves a real problem—quickly and affordably.

  • Best Desk Chairs Under $150 (2026 Guide) – Sit Longer, Work Better, and Reduce Back Pain

    Best Desk Chairs Under $150 (2026 Guide) – Sit Longer, Work Better, and Reduce Back Pain

    Most people don’t realize how much their chair affects their productivity until it starts causing problems.

    You sit down to work. Everything feels fine at first. But after an hour, you shift your position. After two hours, your lower back starts to feel tight. By the end of the day, you’re exhausted—not because of the work itself, but because your body has been compensating for poor support.

    Here’s the reality:

    👉 A bad chair doesn’t just make you uncomfortable.
    👉 It reduces your focus, your energy, and your consistency.

    And this is exactly why desk chairs are one of the highest-impact upgrades you can make.

    Now, many people assume that a good chair has to be expensive. They think you need to spend $300–$500 to get proper support. That’s simply not true anymore.

    In 2026, there are excellent desk chairs under $150 that provide:

    • proper lumbar support
    • adjustable height
    • breathable materials
    • enough comfort for long sessions

    The key is knowing what actually matters—and avoiding cheap chairs that look good but fail in real use.

    This guide is not about listing random chairs.
    It’s about helping you choose a chair that you’ll actually use every day without discomfort.

    If you sit more than 2–3 hours a day, this is not optional.
    This is something you should fix as soon as possible.


    2. Top Picks


    🥇 Best Overall: Mesh Ergonomic Office Chair (Lumbar Support Focus)

    If you want one chair that works for most people, this is the safest choice.

    Mesh ergonomic chairs are popular for a reason. They provide a balance between comfort, airflow, and support—without overheating during long sessions.

    The biggest advantage is lumbar support.

    Your lower back needs support to maintain a natural curve. Without it, your posture collapses over time, leading to discomfort and fatigue. This type of chair helps keep your spine aligned, even when you’re sitting for hours.

    Another key benefit is breathability.

    Unlike padded chairs that trap heat, mesh allows air to flow through your back. This becomes extremely important if you work long hours or live in a warm environment.

    Real-world benefits:

    • less back fatigue
    • more stable posture
    • better focus during long sessions

    The only downside is that mesh may feel firmer compared to soft cushioned chairs. But that firmness is actually what supports your body properly.

    Bottom line:
    This is the best choice for daily work and long-term comfort.


    🥈 Best for Comfort: Cushioned Executive Chair

    If your priority is comfort over structure, this is the better option.

    Cushioned executive chairs are designed to feel soft and supportive from the moment you sit down. They are ideal for users who prefer a more relaxed seating experience.

    The main advantage is immediate comfort.

    The thick padding reduces pressure on your hips and back, making it easier to sit for extended periods without discomfort.

    They also usually include high backrests, which provide additional support for your upper back and shoulders.

    However, there’s an important trade-off.

    Soft chairs can sometimes encourage poor posture if they lack proper structure. Over time, this may reduce the ergonomic benefits.

    This doesn’t make them bad—it just means they are better for users who prioritize comfort and casual use rather than strict posture alignment.

    Bottom line:
    Best for comfort-focused users, but not the most ergonomic long-term.


    🥉 Best Budget Option: Basic Task Chair

    If you’re working with a tight budget, a basic task chair is a reasonable starting point.

    These chairs focus on essential features:

    • adjustable height
    • simple cushioning
    • compact design

    They don’t offer advanced ergonomic features, but they are still better than using a random chair or dining chair.

    This is important.

    👉 Even a basic office chair is a step up from non-office seating.

    Real-world use:

    • short work sessions
    • casual use
    • small spaces

    However, if you work long hours daily, you will likely outgrow this option quickly.

    Durability and long-term comfort are limited compared to better models.

    Bottom line:
    Good for starting out, but not ideal for heavy daily use.


    3. What Actually Matters (Before You Buy)

    Most people choose chairs based on looks. That’s a mistake.

    Focus on these:

    1. Lumbar Support
    If your lower back isn’t supported, you will feel it within hours.

    2. Adjustability
    Height adjustment is essential. Fixed chairs don’t work for everyone.

    3. Material
    Mesh = breathable
    Cushion = soft

    Choose based on your environment and preference.

    4. Usage Time

    • 1–2 hours → basic chair is fine
    • 4+ hours → ergonomic support is required

    4. Pros and Cons

    Pros

    • Improves posture
    • Reduces back pain
    • Increases comfort
    • Supports long work sessions
    • Affordable options available

    Cons

    • Good models cost more than basic chairs
    • Some chairs require assembly
    • Cheap chairs may wear out quickly
    • Not all chairs fit every body type

    5. Buying Guide (Simple Decision System)

    Use this:

    • Long work hours → Mesh ergonomic chair
    • Comfort priority → Cushioned chair
    • Low budget → Basic task chair

    Also consider your desk height and space.

    A chair that doesn’t fit your desk setup won’t solve your problem.


    6. Who Should Buy This

    You should upgrade your chair if:

    • You sit more than 3 hours daily
    • Your back feels tight after work
    • You constantly adjust your position
    • You lose focus during long sessions

    These are signs your current chair is holding you back.


    7. Final Verdict

    A desk chair is not just furniture.

    It directly affects:

    • how long you can focus
    • how comfortable you feel
    • how consistent your work becomes

    The right chair removes distractions.
    The wrong chair creates them.

    You don’t need to spend hundreds of dollars.

    Under $150, there are already solid options that can significantly improve your daily experience.

    Choose based on how you actually work—not just how the chair looks.

    Once you get the right setup, you’ll notice the difference almost immediately.

    And that’s exactly why this upgrade is worth it.

  • Best Electric Toothbrushes Under $50 (2026 Guide) – Upgrade Your Oral Care Without Overspending

    Best Electric Toothbrushes Under $50 (2026 Guide) – Upgrade Your Oral Care Without Overspending

    Most people think brushing their teeth twice a day is enough.

    But here’s the uncomfortable truth:
    how you brush matters just as much as how often you brush.

    Manual toothbrushes rely completely on your technique. That means if your angle, pressure, or timing is off—even slightly—you’re not cleaning your teeth as effectively as you think. Over time, this leads to plaque buildup, gum irritation, and eventually expensive dental problems.

    This is exactly why electric toothbrushes have become so popular.

    They remove inconsistency.

    Instead of relying on your hand movement, an electric toothbrush uses controlled vibrations or oscillations to clean your teeth more efficiently. The result is more consistent brushing, better plaque removal, and less strain on your gums.

    Now here’s where most people hesitate:

    They assume electric toothbrushes are expensive.

    That used to be true. But in 2026, that’s no longer the case.

    There are excellent electric toothbrushes under $50 that deliver real performance improvements—without unnecessary features or premium pricing. The key is knowing what actually matters and avoiding models that look good but don’t perform well.

    Another important factor is habit consistency.

    When something feels easier and more effective, you stick with it. That’s what makes electric toothbrushes powerful—not just what they do, but how they change your routine.

    This guide is designed to help you choose quickly and confidently. Not by overwhelming you with specs, but by showing what works in real life.

    If you want a simple upgrade that improves your daily routine and long-term health, this is one of the easiest decisions you can make.


    2. Top Picks


    🥇 Best Overall: Sonic Electric Toothbrush (Balanced Performance)

    If you want one option that works for almost everyone, this is it.

    Sonic electric toothbrushes are the most balanced choice under $50 because they combine effective cleaning, comfort, and ease of use without unnecessary complexity.

    The key advantage is the vibration technology.

    Instead of rotating like older models, sonic brushes create high-frequency vibrations that help move fluid between teeth and along the gumline. This results in a deeper clean compared to manual brushing.

    Another important feature is the built-in timer.

    Most models include a 2-minute timer with interval reminders every 30 seconds. This ensures you spend equal time on each section of your mouth—something most people fail to do manually.

    Real-world benefit:

    • more consistent cleaning
    • less missed areas
    • better gum health over time

    Battery life is also strong. Many models last 2–3 weeks on a single charge, which makes them practical for daily use and even travel.

    The only downside is that some users need a few days to adjust to the vibration sensation. But once you get used to it, going back to a manual toothbrush feels inefficient.

    Bottom line:
    This is the best choice for most people who want a simple but effective upgrade.


    🥈 Best for Sensitive Teeth: Soft-Mode Electric Toothbrush

    If you have sensitive gums or teeth, choosing the wrong toothbrush can actually make things worse.

    That’s where soft-mode electric toothbrushes come in.

    These models are designed to reduce intensity while still providing effective cleaning. Instead of aggressive vibrations, they use a gentler motion that protects your gums while still removing plaque.

    Why this matters:

    Many people brush too hard without realizing it. Over time, this can damage enamel and irritate gums. A soft-mode electric toothbrush helps correct this habit automatically.

    Another benefit is pressure control.

    Some models reduce vibration when you press too hard. This protects your teeth and encourages better brushing technique.

    Real-world scenario:

    • less gum bleeding
    • more comfortable brushing
    • easier long-term consistency

    The trade-off is that cleaning may feel less “strong” compared to standard models. But for sensitive users, comfort is more important than intensity.

    Bottom line:
    If brushing ever feels uncomfortable, this is the safer and smarter choice.


    🥉 Best Budget Option: Basic Electric Toothbrush Starter Kit

    If you’re not sure whether an electric toothbrush is worth it, this is where you start.

    Basic starter kits focus on core functionality without extra features. They usually include:

    • a single brushing mode
    • standard vibration
    • simple charging system

    No complexity. No learning curve.

    And that’s exactly why they convert well.

    Because many users are thinking:
    “Let me try this without spending too much.”

    Even at a low price point, these models still improve brushing consistency compared to manual toothbrushes.

    But you should be aware of limitations:

    • fewer features
    • weaker battery
    • less refined build quality

    Still, for the price, the improvement is noticeable.

    Bottom line:
    A great entry point if you want to test the upgrade without commitment.


    3. What Actually Matters (Before You Buy)

    Most people get distracted by marketing. Focus on these instead:

    1. Brushing Technology
    Sonic = more modern and effective
    Rotating = older but still usable

    2. Timer Function
    If it doesn’t guide your brushing time, you’ll likely under-brush.

    3. Battery Life
    Longer battery = less hassle = better consistency

    4. Comfort
    If it feels uncomfortable, you won’t use it daily


    4. Pros and Cons

    Pros

    • More consistent cleaning
    • Better plaque removal
    • Built-in timers improve habits
    • Easier daily routine
    • Affordable options available

    Cons

    • Requires charging
    • Initial adjustment period
    • Cheap models may lack durability
    • Replacement heads add cost over time

    5. Buying Guide (Simple Decision Path)

    If you want to decide quickly:

    • Daily use + best value → Sonic toothbrush
    • Sensitive teeth → Soft-mode model
    • Just testing → Budget starter kit

    Also consider how often you travel.

    If you move frequently, battery life becomes more important.


    6. Who Should Buy This

    You should strongly consider this if:

    • You use a manual toothbrush
    • You rush brushing sessions
    • You want better long-term oral care
    • You prefer simple upgrades with real impact

    If you brush every day (which you do), this directly affects your results.


    7. Final Verdict

    An electric toothbrush is one of the simplest upgrades you can make with long-term benefits.

    It doesn’t require effort.
    It doesn’t require learning.
    It just improves what you already do every day.

    And that’s exactly why it works.

    For under $50, you’re not buying a luxury product.
    You’re fixing inconsistency in one of the most important daily habits.

    If you choose the right model and use it consistently, the difference becomes obvious within weeks.

    Better cleaning.
    Better comfort.
    Better routine.

    That’s what makes it worth it.